Construction week 43

image.jpg

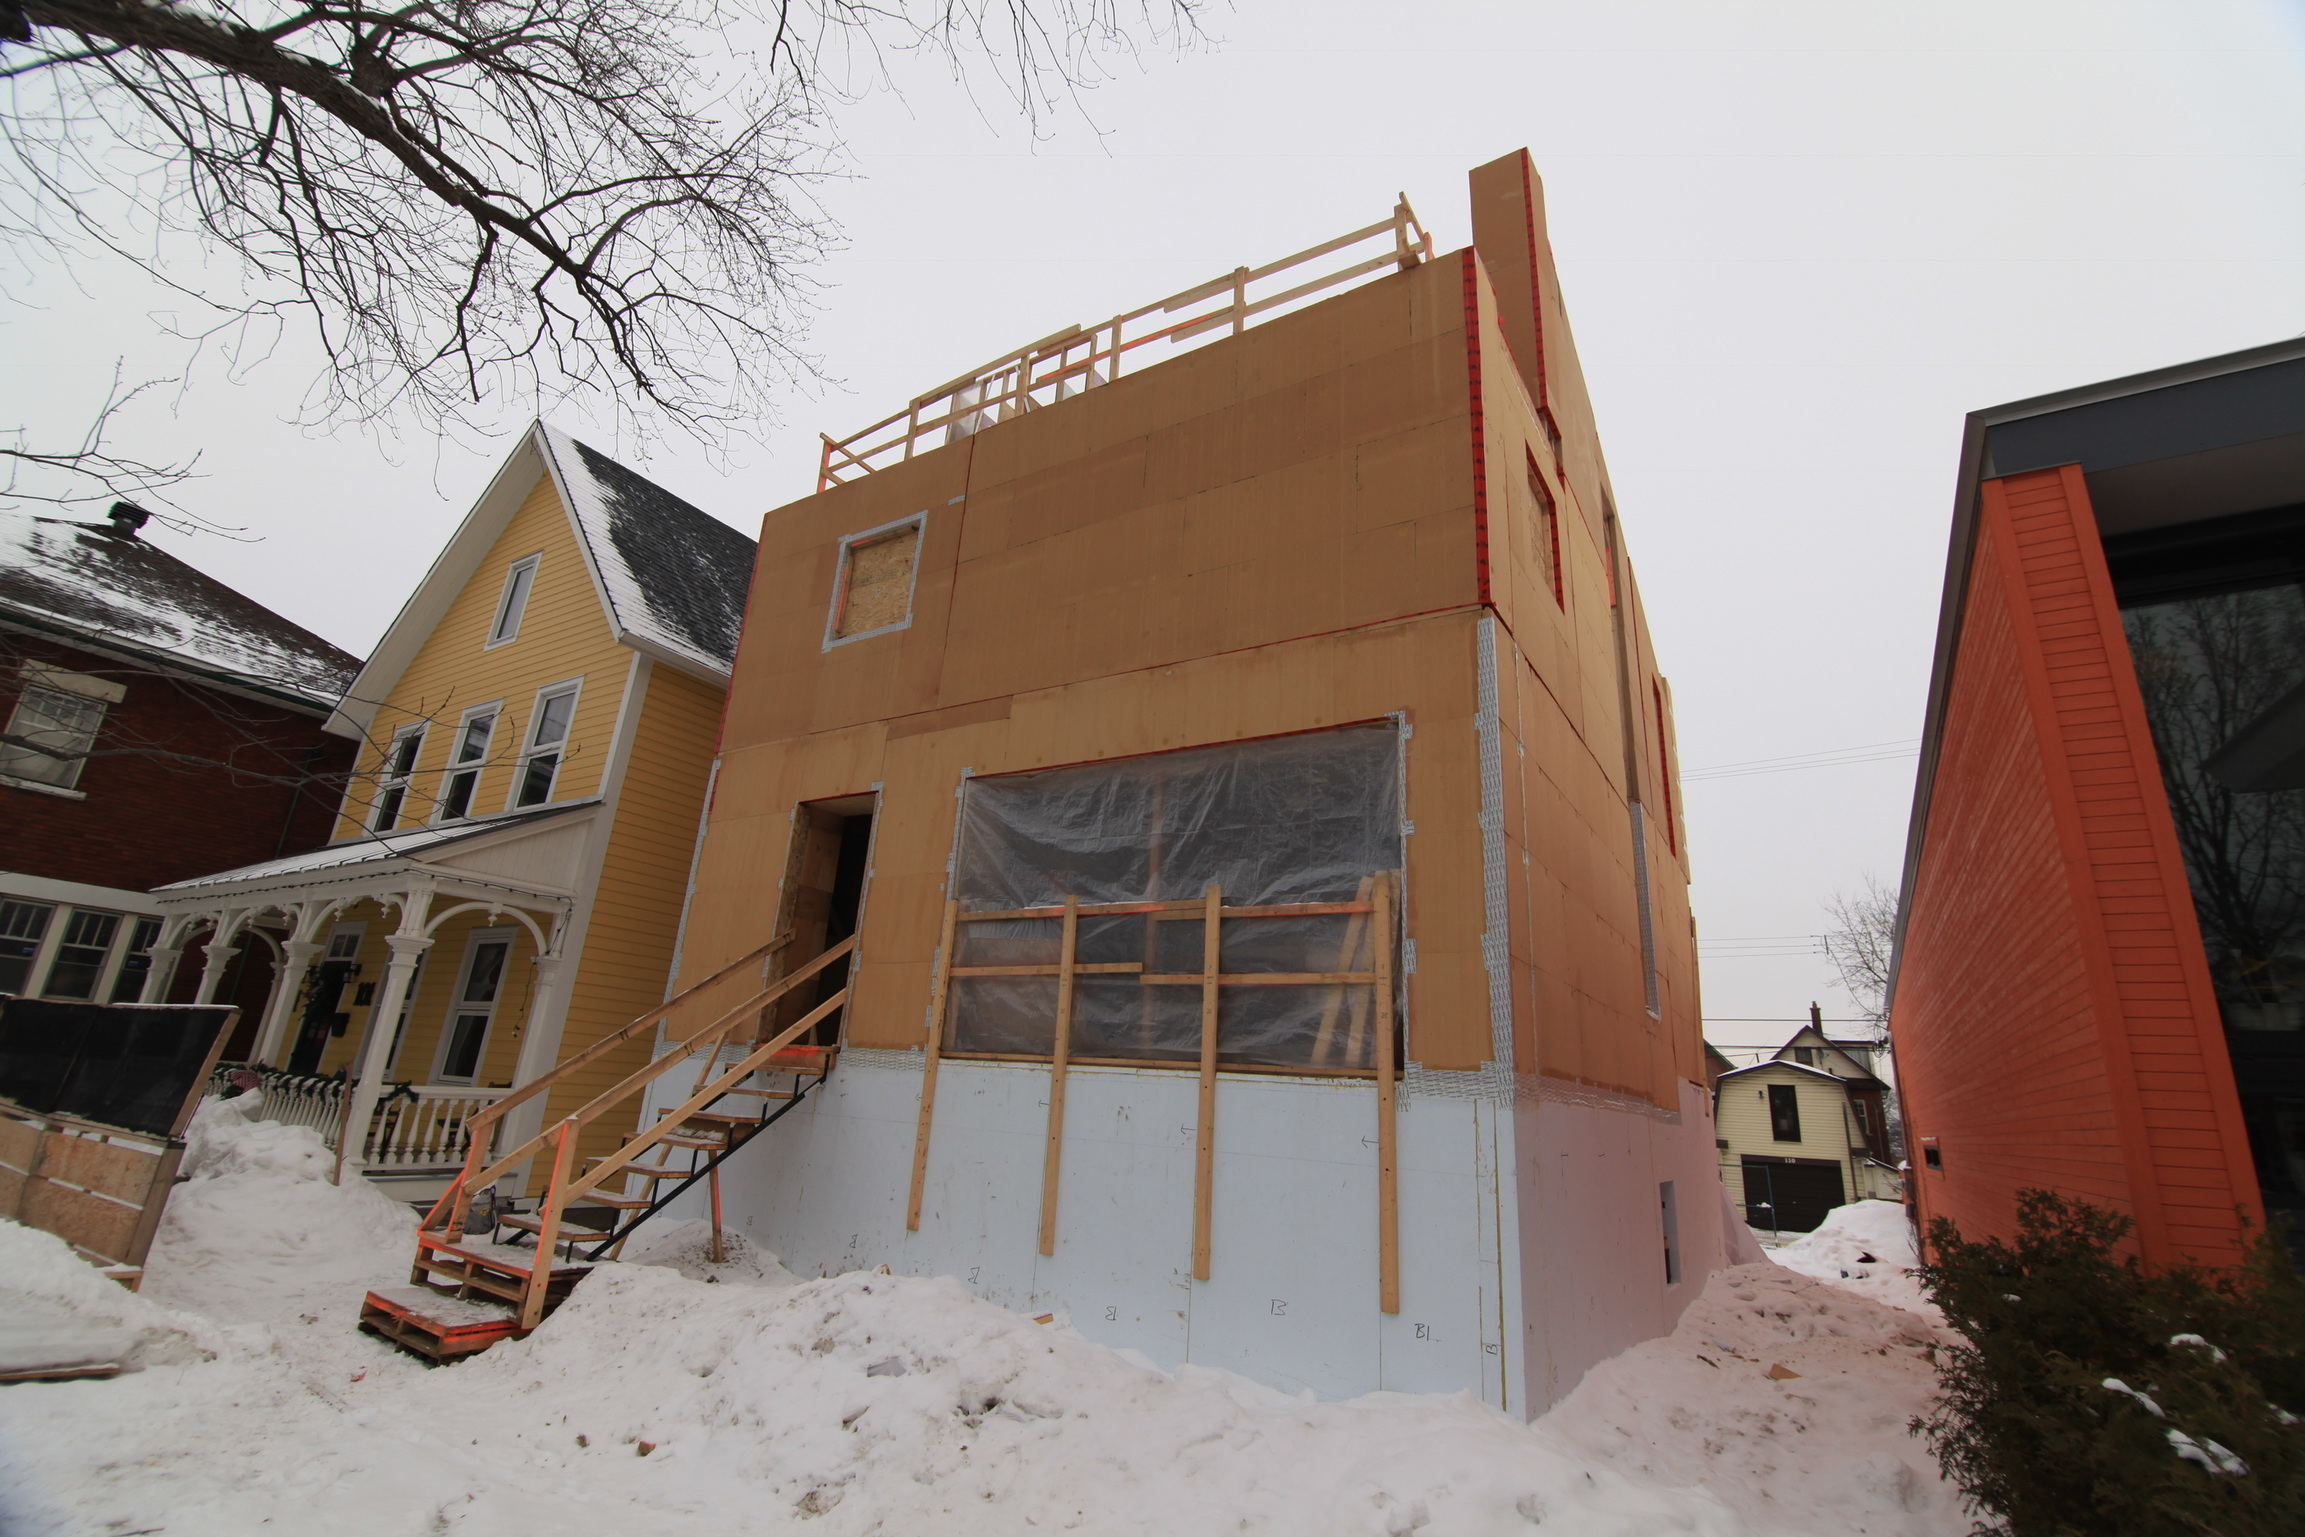
The scaffolding is coming down! The Hardie panel on the front, and along the south side still needs finishing, but otherwise – the siding will be finished this week. Major excitement. The drywall will also be finished this week, including the first layer of primer.

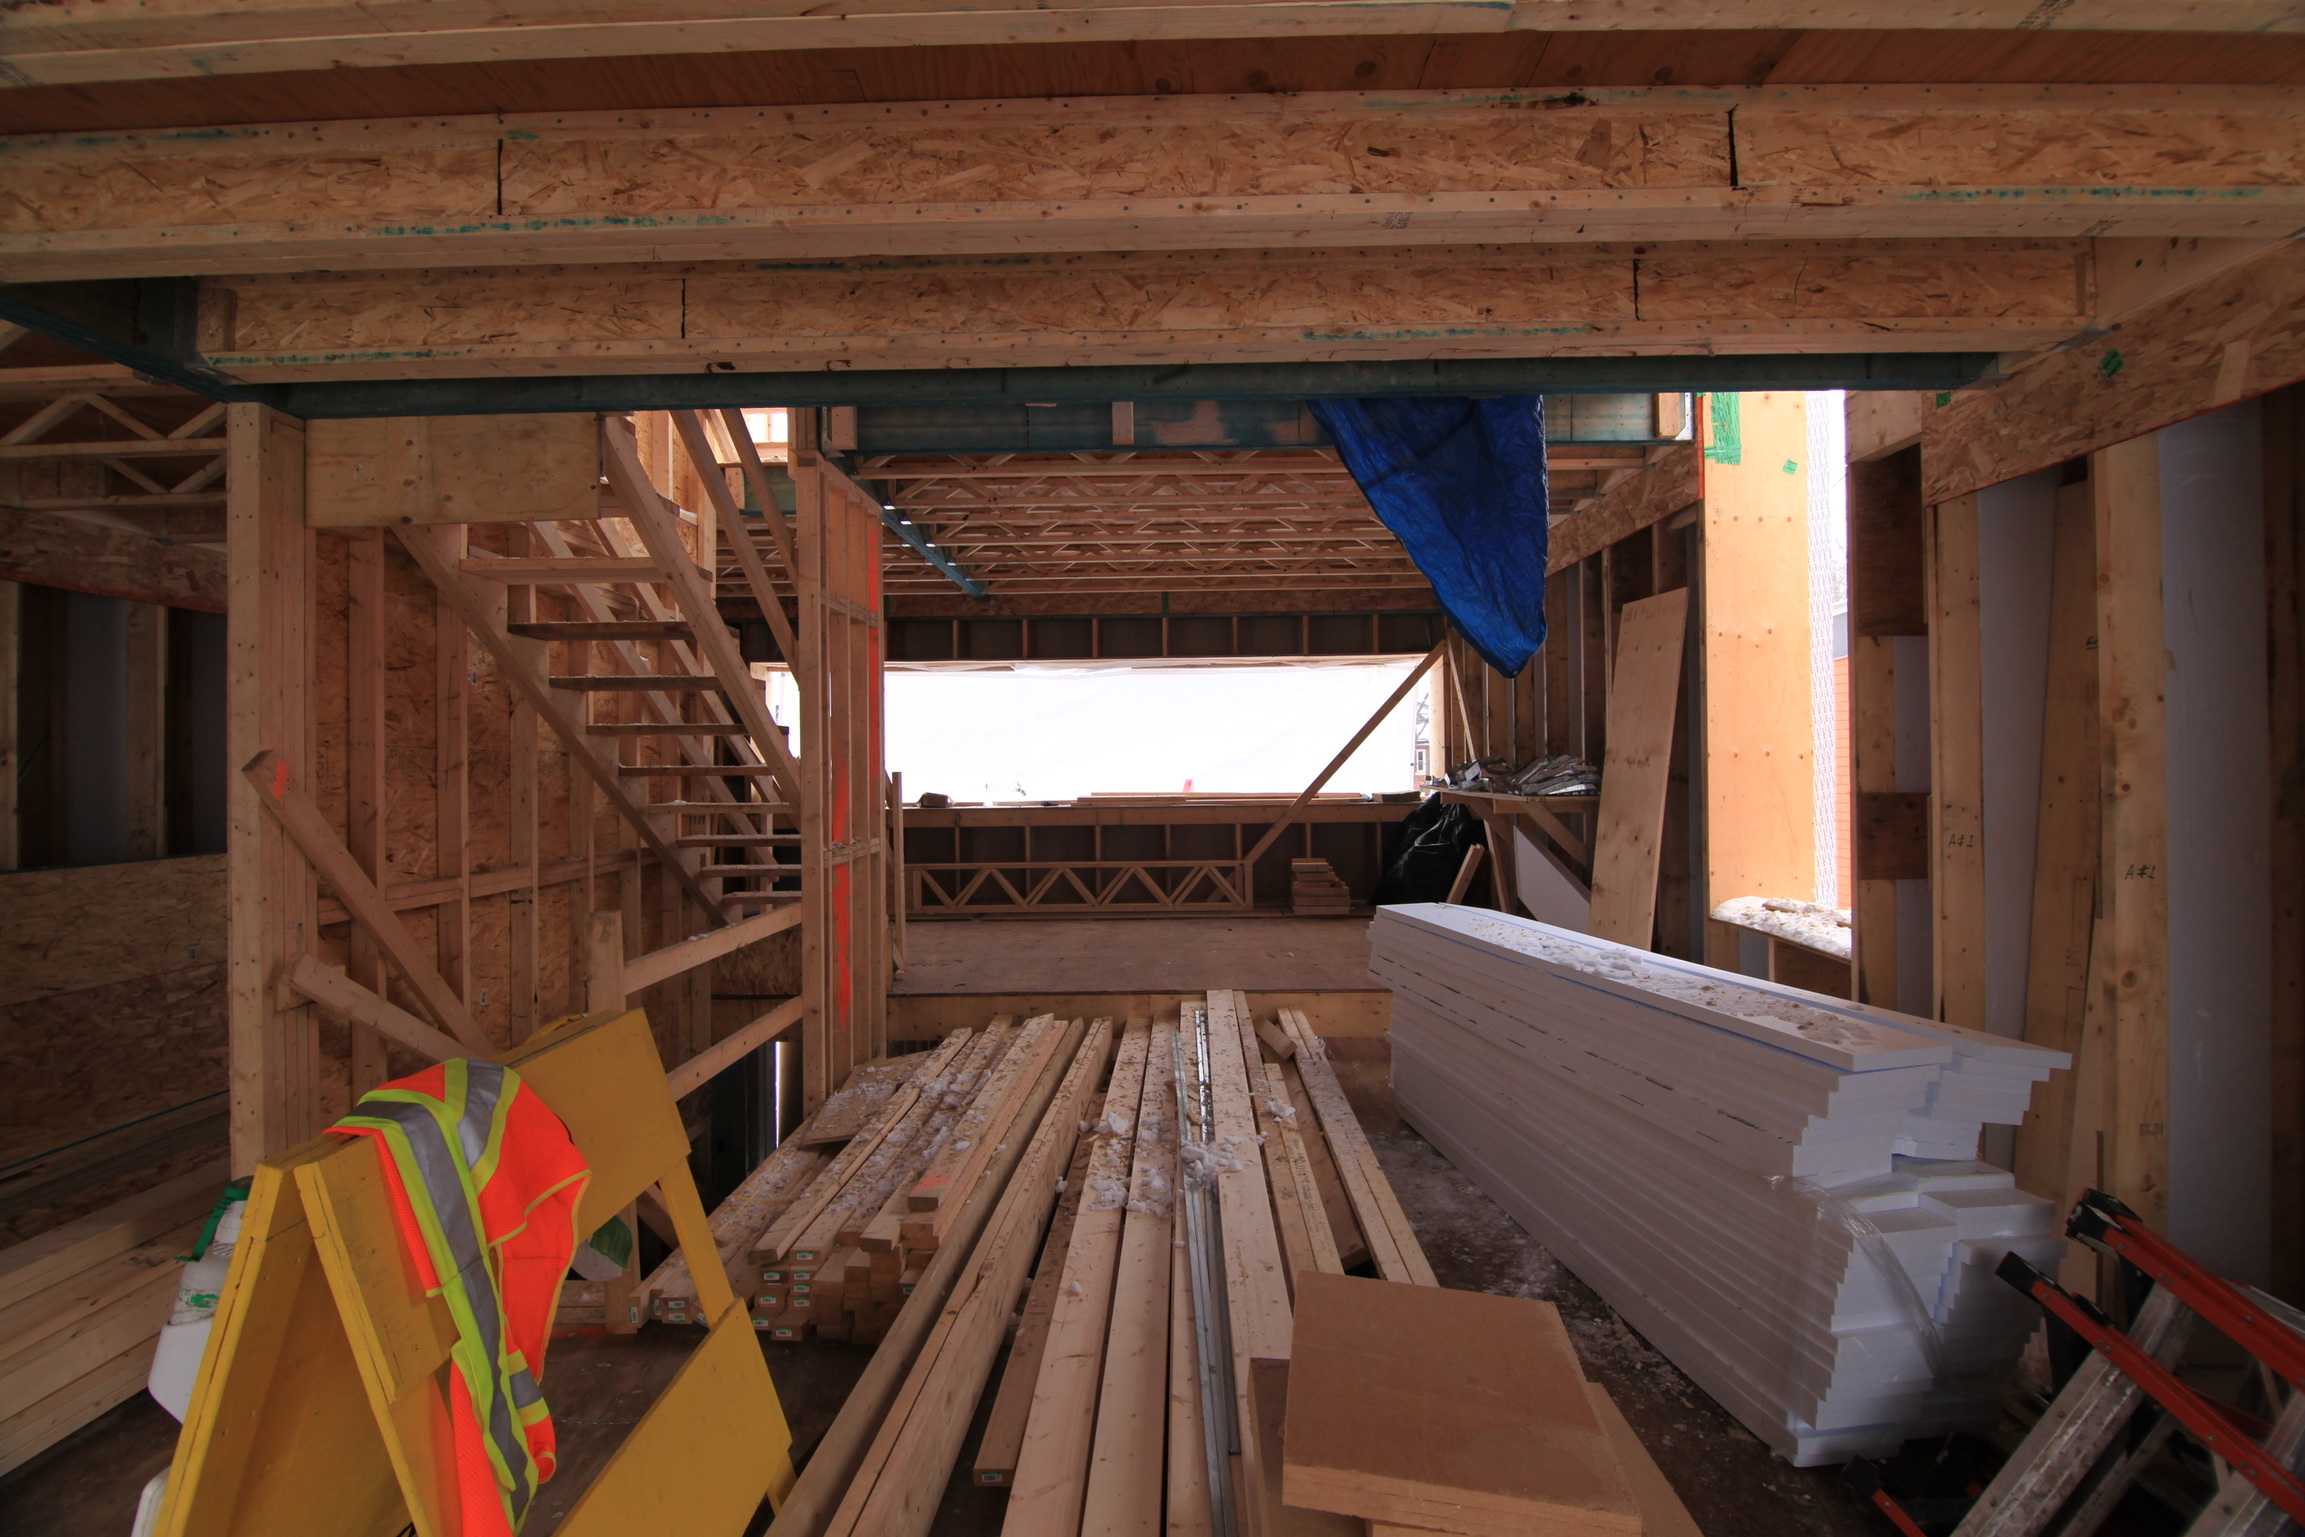
Over the weekend, Mark and I worked away on the house. My mom was in town to facilitate this, helping to watch our girls. It’s extremely satisfying to get out and swing a hammer, so to speak. We made great progress as well. We did a massive cleanup of the job site. We’ll be returning unused lumber and selling or giving away the rest on Kijiji. It’s starting to look less like a job site with all the construction material cleaned up and scaffolding mostly down.

We filled another waste bin to the max. The amount of waste our build has generated is something I’m struggling with. Even though most of the materials came from the earth (wood and gypsum), it doesn’t feel good throwing them back in a landfill. There’s a lot of embodied energy in our dumpster. Our friend Gary told me that according to CMHC, the average waste produced by a new home is 2.5 tonnes. That’s about one and a half dumpsters the size we’ve been using. We’ve already filled two and have ordered another one… Our house is no average house, on the other hand. There's a lot more material inside our walls. Considering our walls are two feet thick, and a standard house maybe 8". This is a case for building for the long term. That helps to put me at ease.

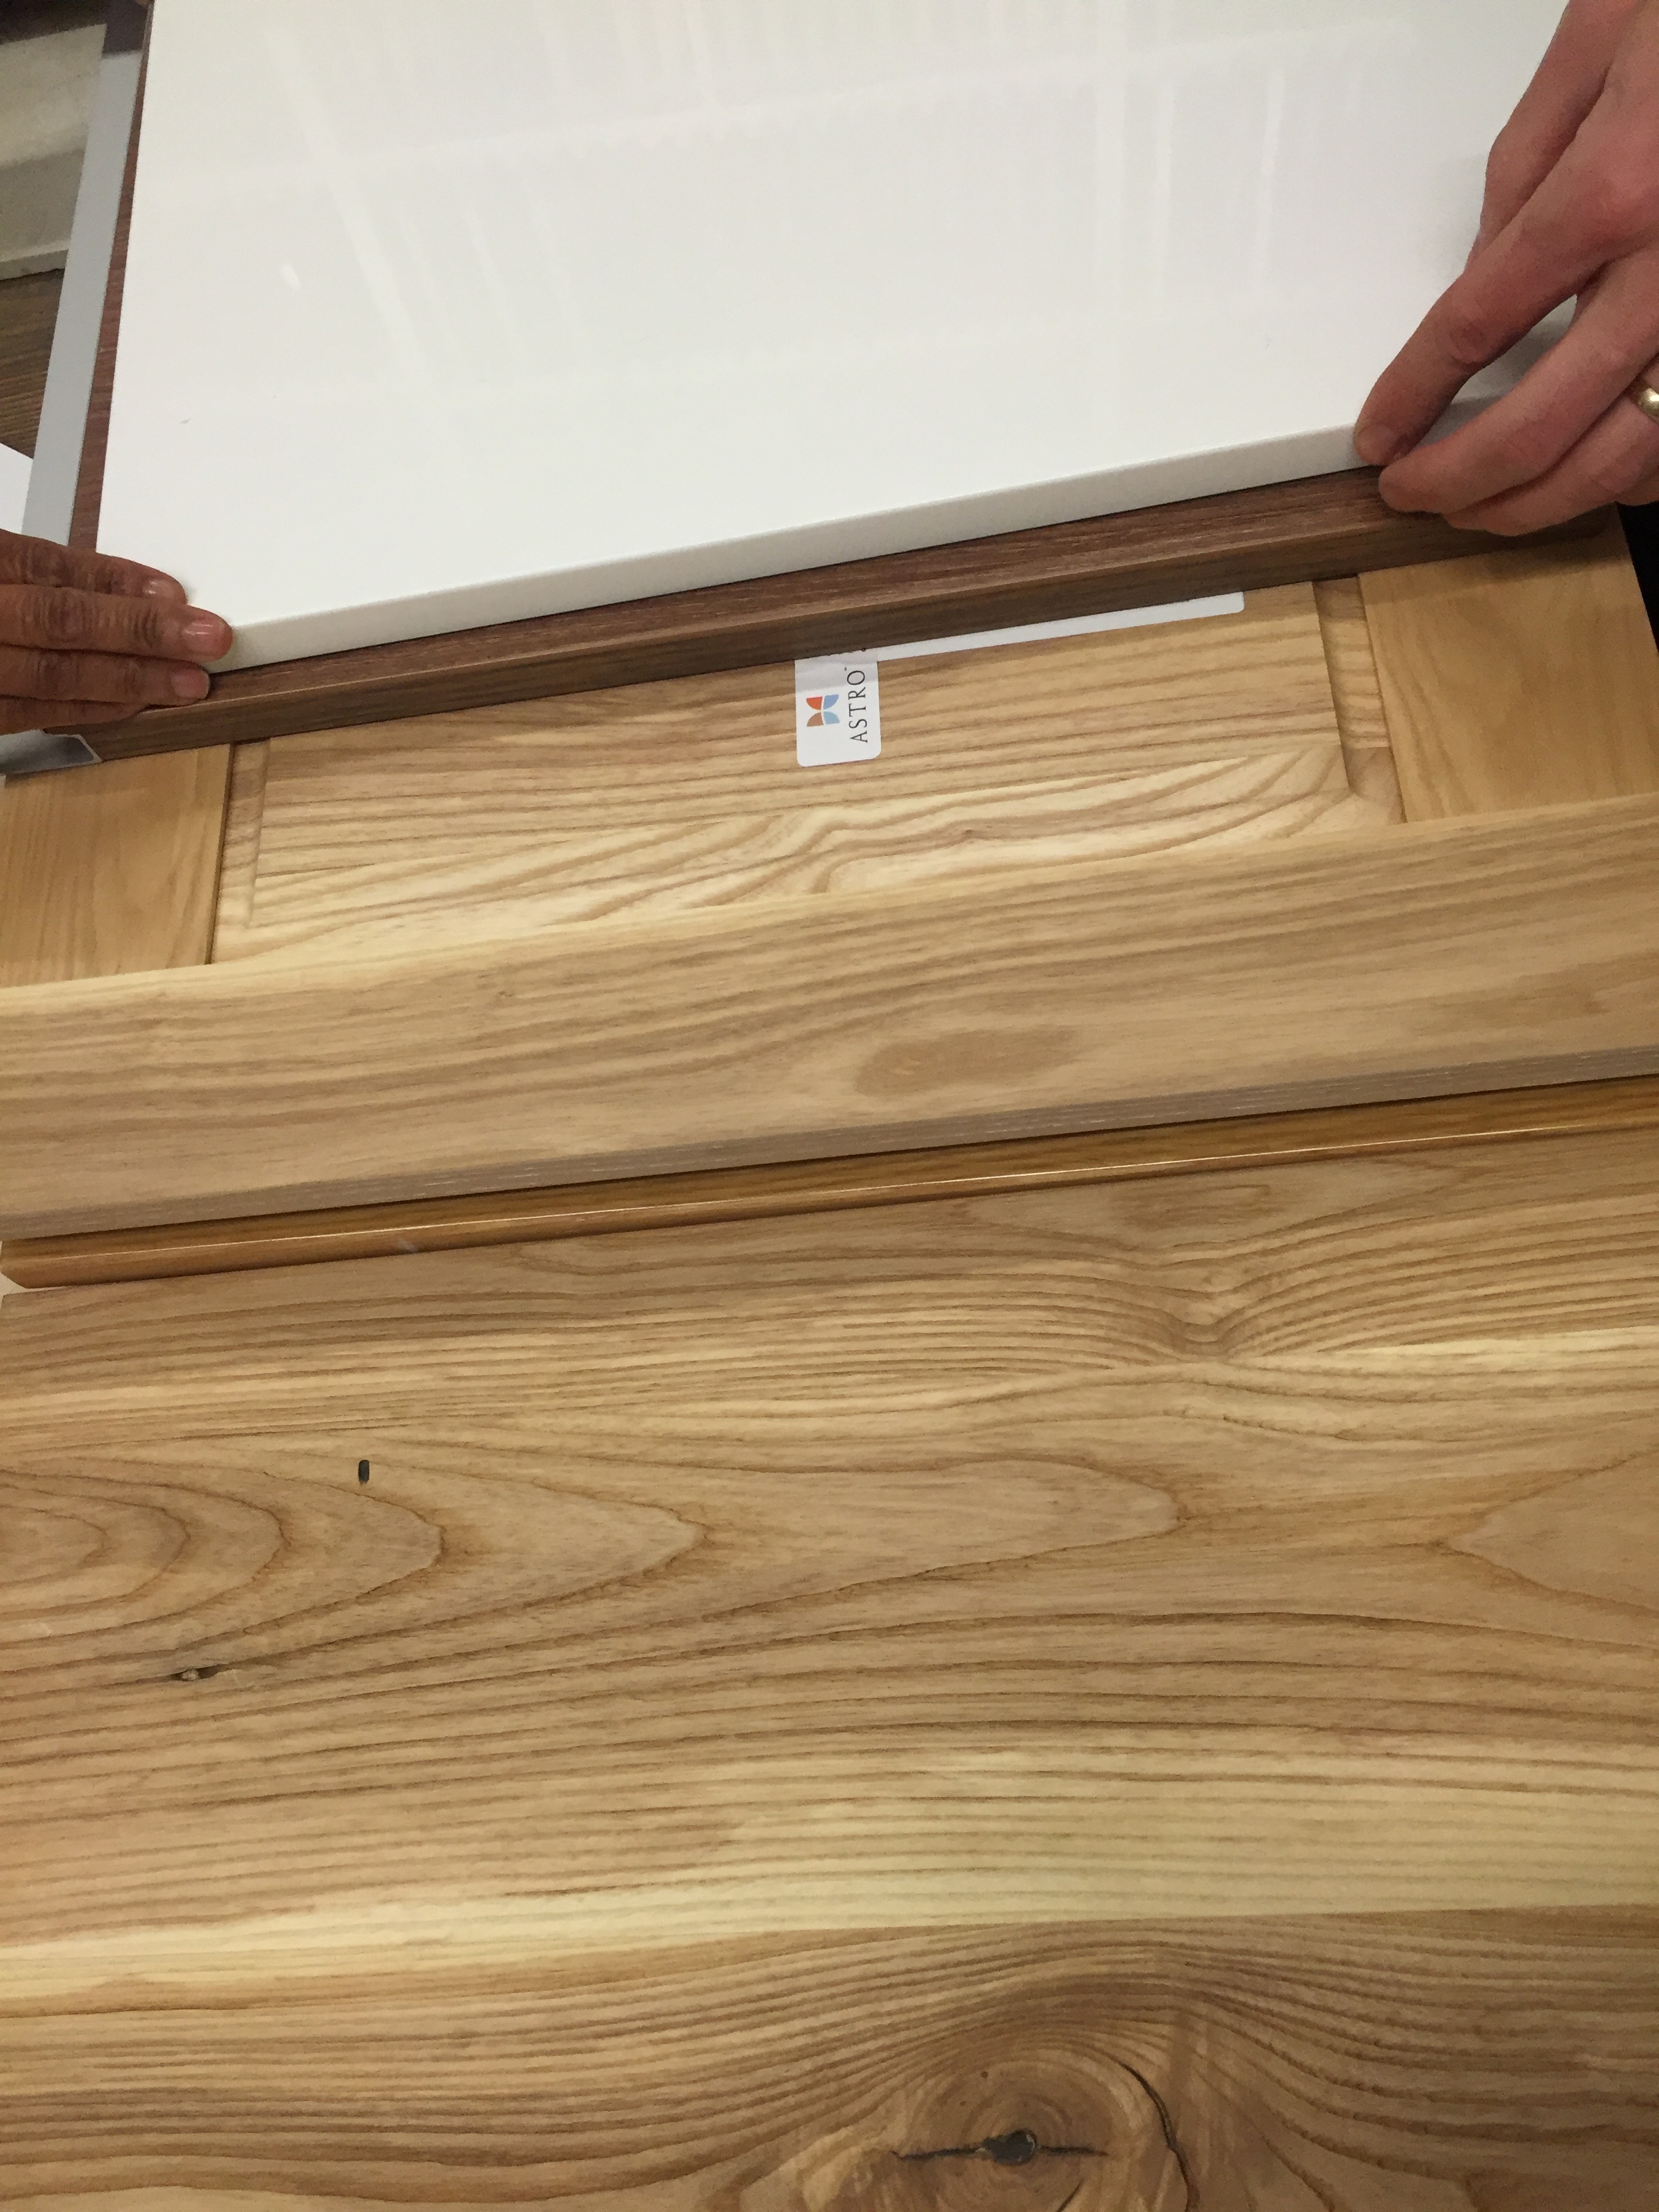
Over the weekend we also started laying the subfloor for our tile guy, who will be starting later this week. We also started on our wood ceiling. Wood ceiling you say? Why yes. We’ve decided to build a slatted wood ceiling. This will add to the sense of discovery we’re hoping to create throughout the house. And will enable us to get clever with our lighting solutions, and hide the mounting tracks. 

Tons of coordination efforts this week. Things are shaping up.

Preview of our wood ceiling

Preview of our wood ceiling

Tidy piles of extra construction material

Tidy piles of extra construction material

House adornments -- pigeon scaring tactics seen to be working!

House adornments -- pigeon scaring tactics seen to be working!

Construction weeks 33 & 34 – plumbing, hvac and more

manifold system

manifold system

plastic in the walls

plastic in the walls

Wow, it’s been a couple weeks since I’ve provided an update. The house has been relatively quiet with only one or two people working at a time. That has since dramatically changed…

Nathan, from Ackland Plumbing, has finished the first rough-in phase for plumbing. We’ve got spiffy (BPA-free) breathable supply pipes running through the house, and a purple one which supplies the grey water. He was explaining to me how, just 10 years ago, a different kind of plastic pipe was getting installed in Canadian houses, one which does not breathe and where water stagnates and becomes unsafe for drinking. Insurance companies will not insure these houses and lawsuits are being filed against the building code. Lesson learned: what seems like a good idea today, may very well prove to untrue tomorrow. And wet things need to breathe, trapped moisture is the enemy of building. I digress. Back to our house.

Nathan managed to carefully maneuver all supplies and drains in and between our open floor trusses and walls. The design of our house helped to facilitate this, with Mark stacking all the plumbing and electrical to one side of the house, over the mechanical room. (This poses absolutely no risk Myles btw (comment from previous post), it’s actually a really clever thing to do when building because all utility runs are minimized in terms of materials and labour). We’ve received numerous compliments on Nathan’s handiwork and it passed the plumbing inspection no problem-o. He’s as excited as we are to have a neat and tidy mission control in our mechanical room, where we’ll go copper for added ‘wow’ factor. Good stuff.

wood fibreboard clads the house until the siding gets installed overtop

wood fibreboard clads the house until the siding gets installed overtop

the cardboard box phase

the cardboard box phase

Speaking of passing inspections, we also passed our building envelope inspection. Hooray! We were nervous about this one because we weren’t sure how the inspector would feel about forgoing the traditional Tyvek weatherproof house wrap for our wood fibreboard. The wood fibreboard is more common in Europe and is not often seen on our side of the pond. Mark provided specs to the building inspector and explained it to him. We’re fortunate to have an experienced and open-minded official. But there’s no doubt to anyone walking through or around our house that it’s a well-built, thoroughly considered house.

zehnder hrv unboxing
zehnder hrv

And back to the mechanical room. Hans from Pinwheel Builds met with Mark and dropped off our new Zehnder HRV and heat exchanger along with coils of flexible plastic pipes, which are to be our house’s air ducts for circulating what little heat we require. It’s a pretty groovy system. We won’t have any gross floor ducts, bulkheads or metal work in our house. All you’ll see are small 8” diameter circles mounted to the occasional wall and ceiling to circulate air. Mark went over his plan with Hans and has started installing the ducting himself. Unboxing the parts was better than Christmas for Mark. He was so excited.

parapet roof

parapet roof

new carhartts

new carhartts

From here on out, Mark will be spending as much time as possible working on the house himself. He bought himself a spiffy new pair of Carhartt overalls for the task ;) In addition to starting the ducting, he finished the parapet (a fancy word for structural railing) on our flat roof, cleaned up the front and back yards, and hosted another tour. This last one saw around 30 people who joined as guest of Malcolm Isaacs, who runs the local Passive House courses and is a director of the Canadian Passive House Institute.

brown ash cabinets

brown ash cabinets

ash and gloss white

On the backend, we ordered our kitchen. Another hooray! Finally. There were a few back-and-forths during the homestretch, which prolonged the process, but were key for getting the details ironed out. We’re really excited about it. We ended up going with Astro Design Centre and have had a great experience working with Dean Large. He ‘gets’ us, in terms of design, and was able to add real value to our design experience, which we really appreciated. Astro also had the finishes we liked the most, at the best price. For example, a gloss white was the same cost as a matte white (typically gloss costs more). And we don’t want any hardware, we want recessed handles (a no hardware look typically costs more). We went with the Astro house brand in white gloss for all the cabinets except those on the backside of the island. The backside of the island faces the living area. For these cabinets we chose a sand-blasted (i.e. textured) brown ash. Haven’t ordered our countertops yet. That’s next.

Following suit, we made a decision on our wood flooring and placed the order. We’ve decided to go with white ash from the Wood Source. The same white ash that the city of Ottawa has felled throughout the city to thwart the Emerald Ash Borer. It will be sympathetic to the island wood. We also decided to order some extra wood for the sloped ceiling, which spans our open space, over the master bedroom and loft. A slatted wood ceiling will allow for clever lighting hacks. We’ll be able to hide much of the hardware behind the wood so that we only see what we want to see and can get away with using less expensive fixtures at no aesthetic compromise. It will also look incredibly beautiful. It’s a win-win.

As alluded to earlier, the house is buzzing again this week. Siding has begun amongst other exciting things. Do stay tuned and lookout for another Mark Periscope. He broadcast just today. And hope you’ll join the next house tour!

Construction week 22: wall framing complete

The girls are happy (and toasty) in these walls.

The girls are happy (and toasty) in these walls.

At long last, our house has been framed in. (We still need a roof over our heads — a minor matter.) It feels good to have that massive task behind us. Our builders are, no doubt, also quite happy about this.

Our walls were no ordinary walls; they were an experiment/idea Mark had as to what they needed to be and how they needed to come together. This wall phase took a couple weeks longer than anticipated by Mark. There were bumps along the road, and a definite learning curve, but the team hit their groove, in spite of the bone-chilling temps, and put together one helluva house shell. We were fortunate to have such an open-minded and capable team, headed by Justin at Cornelis Grey.

We've rented a crane, for this coming Tues, to lift our roof trusses up so the roof can get going this week. Yay! And we're starting to line up tasks to follow. Windows, insulation, siding... Not to mention a whole slew of decisions requiring our attention, e.g. cabinetry, fixtures, flooring... There's no shortage of things to do.

And here are some shots of the shell from today.

Hello walls

Hello walls

Welcome inside

Welcome inside

In the kitchen

In the kitchen

The wander window in the 'void'. Only 19'10" high (HA!)

The wander window in the 'void'. Only 19'10" high (HA!)

In the loft

In the loft

Looking towards the back of the house

Looking towards the back of the house

Rooftop patio

Rooftop patio


2nd floor takes shape

Joists and hangers and LVLs galore

Joists and hangers and LVLs galore

The joists and beams for the second floor are in! Today we start installing subfloor and railings. It's really exciting to see the views taking shape as we get higher!

This is the open space over the dining room, and the start of our tall south window

This is the open space over the dining room, and the start of our tall south window

Getting closer and closer to the canopy of our silver maple! 

Getting closer and closer to the canopy of our silver maple! 

Construction week 15: wall to wall

This week our crew squared up the first floor walls, installed some LVLs (laminated veneer lumber) to support the floor above, framed some interior walls and started putting up floor joists for the floor above.

With the first floor framed in, it's starting to look and feel like a proper house :) Have a look at Mark's Periscope from this past Friday.

We can't believe our luck with the weather these past couple weeks. It has been positively balmy. If mother nature keeps this up, we can shave R-20 and a foot of insulation off our house. Just kidding...I have full confidence that Mother Nature will show up with a vengeance. As she always does for us here in Ottawah. We'll take what we can get.

Floor joists going in.

Floor joists going in.

Our spectacular kitchen window. Deep walls = added counter top!

Our spectacular kitchen window. Deep walls = added counter top!

Construction week 14: first floor framing complete

The sun sets over another week. 

The sun sets over another week. 

The last two walls went up this Monday. Here is a Periscope from the weekend with a special guest star appearance. Teaser: it was me. We put the final touches on the walls together. 

We are counting our blessings lately for all this "warm" weather. 

Construction weeks 10 & 11: foundation complete

Last I wrote, I left us on a cliffhanger, didn’t I? Wood and hammers and nails — oh my! 

Oh no.

I jumped the gun. Much prep was yet required before framing could begin in earnest. Those tasks included:

1. Glued the last few stacks foam to the outside of our basement walls

All that foam combined (R-4/inch) should have an R-value of 74. (Ontario Building Code requirements for a foundation are as low as R-12 on the walls only).

Last layers of foam held in place while glue sets.

Last layers of foam held in place while glue sets.

2. Installed the frost skirt

Because the bottom of our foundation isn’t quite deep enough to guarantee that it will be below the frost line on any given winter, we needed a frost skirt. (This is a standard detail for shallow foundations in Canadian construction). It’s a thin layer of foam installed horizontally around the permitter of the building at foundation depth. Typical frost penetration is around 4 feet in Ottawa, but last years' exceptionally cold winter brought that to 6’. A frost skirt is used on shallow foundations to extend the path that frost must travel to reach the bottom of a foundation. Bad news if it were to happen — expansion, contraction (heaving) leads to cracks and structural damage. 

Frost skirt and overlapping and waterproofing membrane.

Frost skirt and overlapping and waterproofing membrane.

3. Waterproofed the foundation

Using a Nudura waterproofing membrane, which is a peel-and-stick rubberized sheet. This required some patience because the foam had to be cleaned and dried prior to application. It wasn’t adhering as snugly as we’d have like to see, either. Some temporary strapping helped with this. A dimple board, held on place with metal fasteners, was layered over top of the membrane. Bam. Waterproofed.

4. Set up drainage

Water shall not pass (our membrane) and will weep if it dares to encroach. Weeping tile was placed around the perimeter of the foundation and connected to the storm sewer. There is a filter sock around it to prevent it from filling up with sand. (Am I the only one who finds the term weeping tile odd? There is no porcelain or ceramic whatsoever. It’s a plastic pipe with some nylon around it. Weeping tile does sound dramatic, however. I therefore think it sticks).

Dimple board and weeping tile.

Dimple board and weeping tile.

5. City inspection

Our city inspector wanted to check things out prior to back fill. So he paid a visit. He decided he wanted to throw in an additional check, which threw a bit of a wrench in to our coordination efforts (see next step).

6. Backfill

There were two steps to the backfill process. First we covered the drain tile with clean gravel (as to not clog the nylon with sand and silt straightaway). Cue city inspector – who gave us the thumbs up. And then we filled up the hole with native fill (some of which has been sitting around and taking up precious room on site and some that was stored off-site).

My oh my. What a difference this back fill has made. Now that half of the foundation walls lie underground, it actually looks and feels like a basement from the outside. 

Backfill stage 1: clean fill

Backfill stage 1: clean fill

Backfill stage 2: native fill

Backfill stage 2: native fill

7. Sill plate leveling and installation

This sill plate is what our first floor walls rest on. It’s a 2 x 6” piece of lumber that’s installed on top of the concrete, leveled with grout. 

sill-plate-ottawa-passivehouse

8. Ledger board and air barrier prep

The ledger board is what our first floor floor rests on. Remember those ledger bolts that were screwed into the concrete? These hold up the 2 x 10” ledger board. But out air barrier goes up first – Siga MAJPELL 5 membrane. Mark had a Periscope broadcast on this last week. They installed it with excess available to overlap once the second/main floor goes up. (Gotta keep that air barrier line as clean and streamlined as possible!)

Air barrier detail over ledger bolts

Air barrier detail over ledger bolts

Ledger board install

Ledger board install

And so forth

That’s the house up-to-date. Additionally, we had a few deliveries made and spent some time shuffling our construction materials around as we suddenly had a lot more room with the backfill out of the way. Our neighbours were no doubt pleased to regain their front lawn. And we lost a couple days due to bad (wet) weather.

Lotsa stuff out front. 

Lotsa stuff out front. 

Behind the scenes, there was a bit of good news. We applied for our first construction mortgage withdrawal. Mark explained our house build to the appraiser, and why our breakdowns/allotments should be different. The appraiser accepted Mark’s breakdowns — whoot! We have been reimbursed for Phase 1. Foundation complete. This helps alleviate some of our financial pressures.

For next week: wood and hammer and nails — oh my!