Periscope winter framing

The build has been frozen over the holidays, both literally and figuratively. So has my writing. Admittedly, I've been feeling frustrated that we weren't able to race ahead while the going was good (with the weather). I had hopes and dreams to be closed in before Christmas. Alas. There's a learning curve to be had with our wall system. And we've only had 2 or 3 guys out working most days. The second floor framing is coming along nicely now. We're full steam ahead in the new year. Whoooot! Attempting to stay warm and carry on.

2nd floor takes shape

Joists and hangers and LVLs galore

Joists and hangers and LVLs galore

The joists and beams for the second floor are in! Today we start installing subfloor and railings. It's really exciting to see the views taking shape as we get higher!

This is the open space over the dining room, and the start of our tall south window

This is the open space over the dining room, and the start of our tall south window

Getting closer and closer to the canopy of our silver maple! 

Getting closer and closer to the canopy of our silver maple! 

Construction week 15: wall to wall

This week our crew squared up the first floor walls, installed some LVLs (laminated veneer lumber) to support the floor above, framed some interior walls and started putting up floor joists for the floor above.

With the first floor framed in, it's starting to look and feel like a proper house :) Have a look at Mark's Periscope from this past Friday.

We can't believe our luck with the weather these past couple weeks. It has been positively balmy. If mother nature keeps this up, we can shave R-20 and a foot of insulation off our house. Just kidding...I have full confidence that Mother Nature will show up with a vengeance. As she always does for us here in Ottawah. We'll take what we can get.

Floor joists going in.

Floor joists going in.

Our spectacular kitchen window. Deep walls = added counter top!

Our spectacular kitchen window. Deep walls = added counter top!

Construction week 14: first floor framing complete

The sun sets over another week. 

The sun sets over another week. 

The last two walls went up this Monday. Here is a Periscope from the weekend with a special guest star appearance. Teaser: it was me. We put the final touches on the walls together. 

We are counting our blessings lately for all this "warm" weather. 

Our Passive House wall truss system explained

One of our wall sections being assembled and ready for lifting!

One of our wall sections being assembled and ready for lifting!

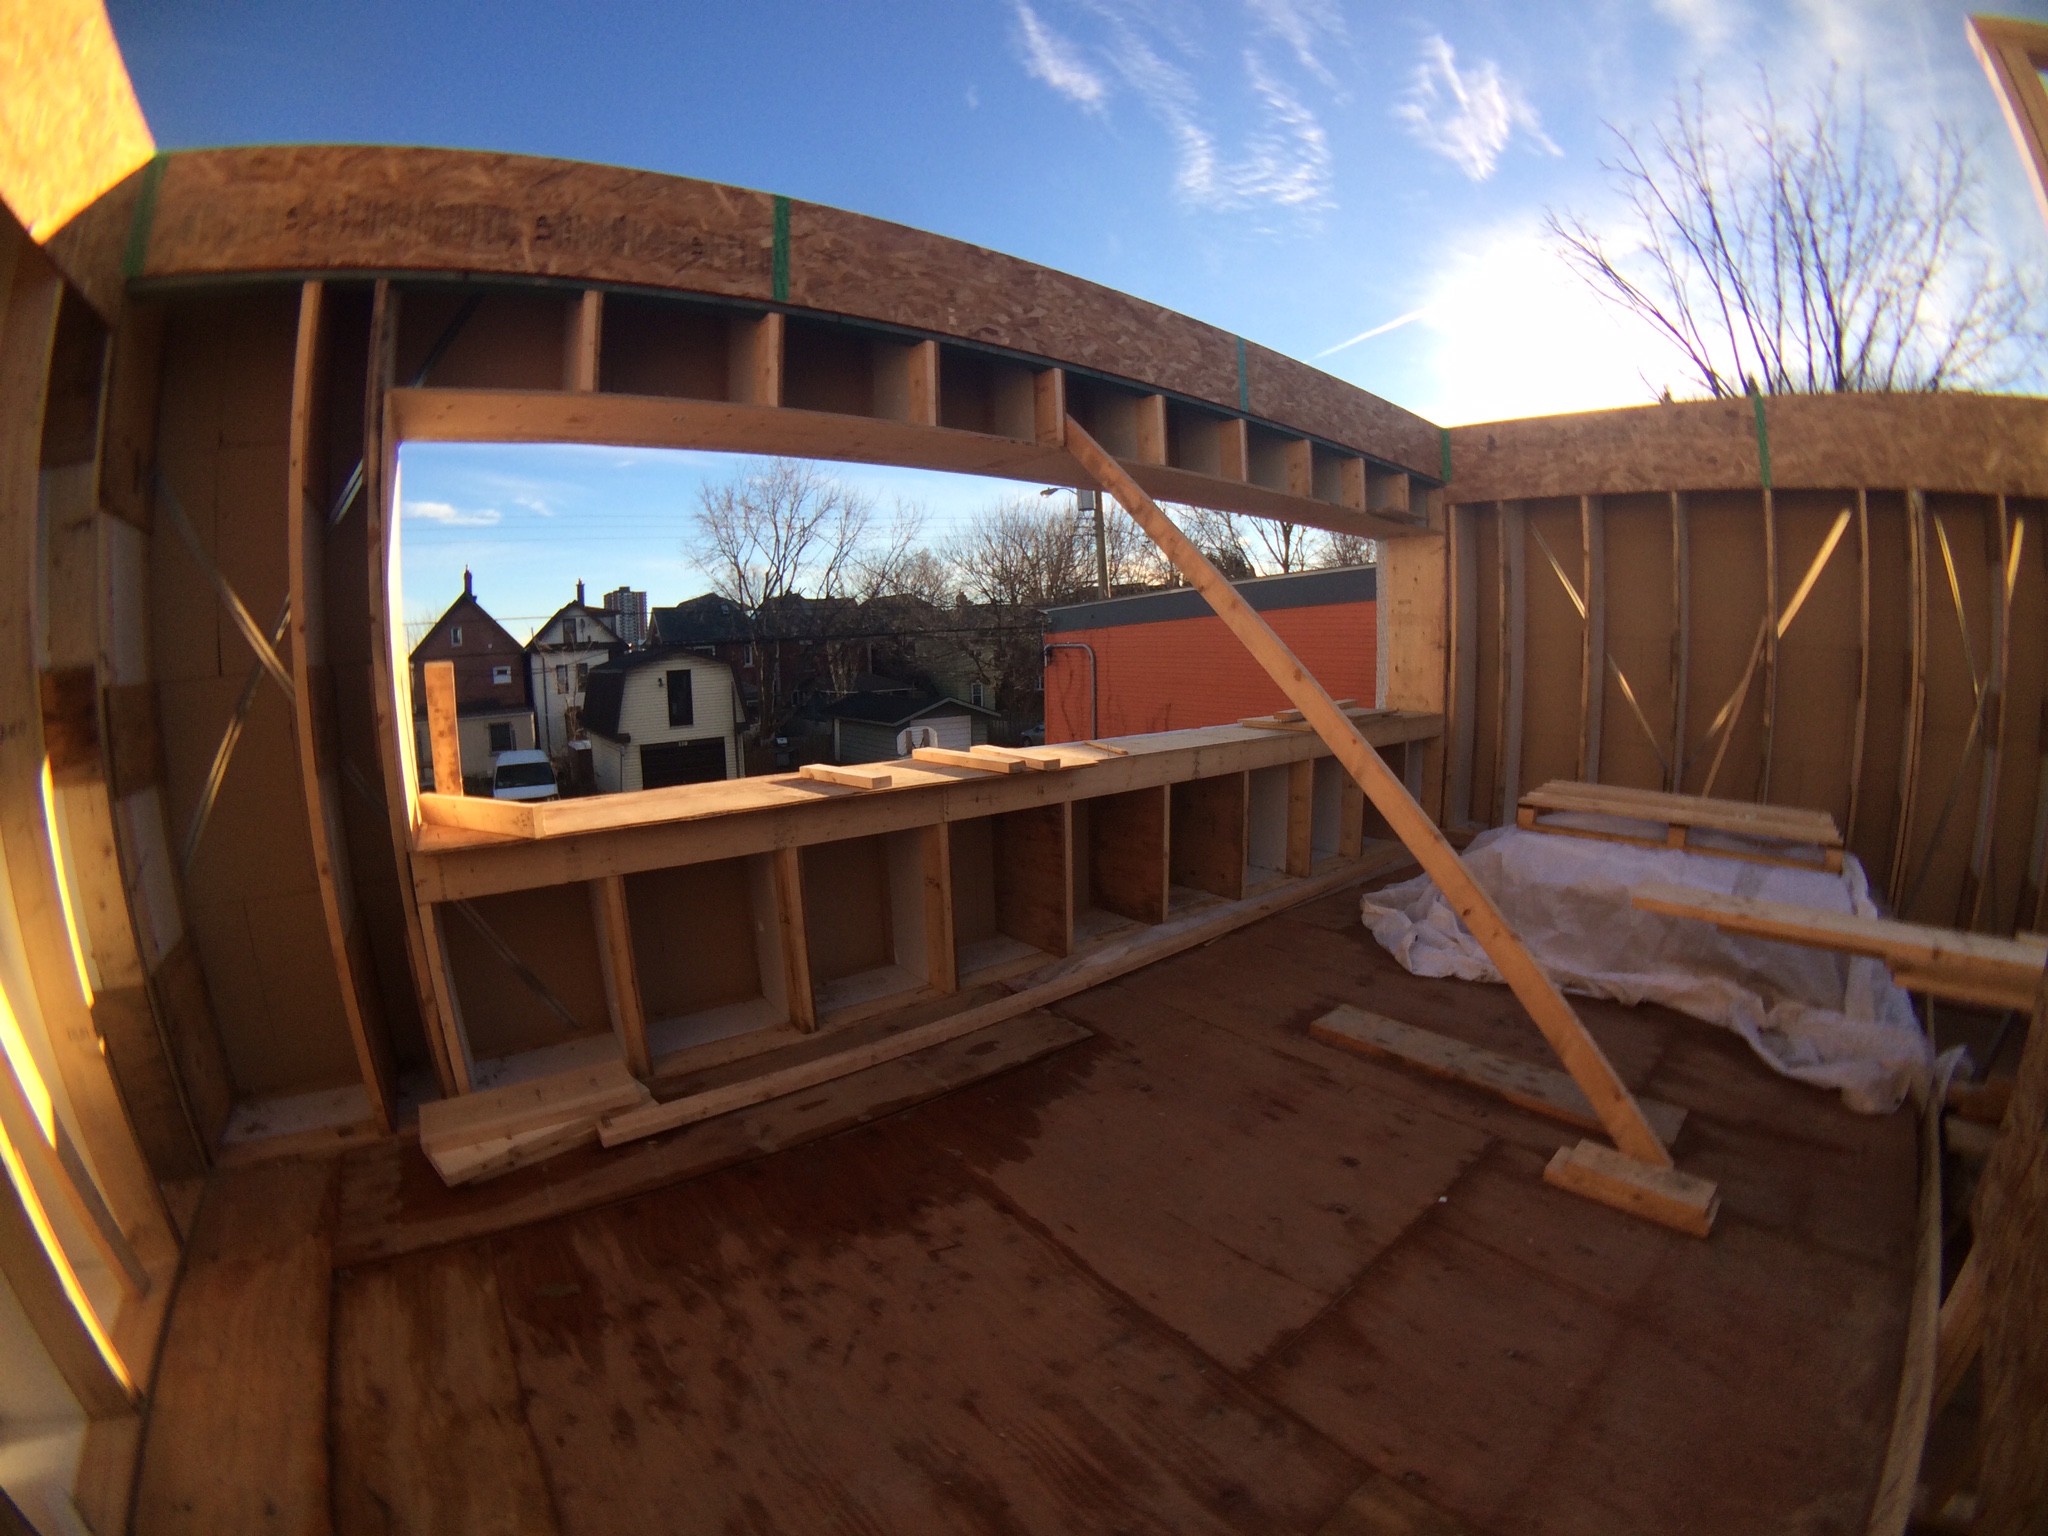
With the wood framed walls well underway now, I thought it was high time that I sat down to write a post about the design and theory behind the wall system we are using. When we set out to build our project, I spent a lot of time thinking about double stud wall construction. For those unfamiliar, a double stud wall is a wall made up of two seperately framed walls, one inside of the other, usually seperated by a space for insulation. The beauty of the double stud wall is that the overall thickness of the wall is very flexible: by moving the two stud walls further apart you can add insulation and increase the effective R-value of the whole assembly. The continuous insulation is also a great thermal break preventing thermal bridging through studs.

Still, there are a couple of challenges that the traditional double stud wall presents. First of all, the exterior wall is usually built first, and the interior wall much later once the house is enclosed. The main drawback of this is that the exterior wall necessarily becomes the load bearing structural wall. I'm a big fan of keeping structure as much to the inside of the thermal envelope as possible for two reasons: first, it keeps the structural elements warm and dry and protected from cycles of expansion and contraction, and second, it reduces the number of structural penetrations or complex structural details that interfere with a good air barrier.

When designing the system for our project, I set some key goals for myself. I wanted to have a system that hit all of these key points:

  • Structure to the interior

As discussed above, this is just the right place for structure to be. It also facilitates the next point below...

  • Air barrier to the interior, and as straight and uninterrupted as possible

I wanted to use OSB with taped joints for the primary air barrier. In order to keep from having a messy transition at floors, the idea was to come up with a way to run the air barrier up straight past the floors without joist cavities to contend with

  • Excellent drying potential

With all walls, and especially with high R-value walls, it is crucial that the wall has good drying potential, and that no opportunities for condensation are created within the assembly.

  • High R-value (obviously!)

This could have been the first point. Super-insulated is Passive House's alternate code name.

  • Can be insulated from the interior after framing is complete using mineral wool batts

I wanted to avoid insulation that would require scaffolding or lifts for installation, partly because of the limitations of the site, and partly for cost and labour savings. In terms of insulation type, I'm a big fan of mineral wool insulation. What's not to love? It's water resistant, mould-proof, fire-proof, high in recycled content, and has a good R-value that actually improves as it gets colder outside.

Wall section: Click to enlarge

Many hours of sketching and head scratching and I came up with the idea of creating a hybrid system. Taking some cues from Swedish platform framing, and some from the double stud wall approach, I designed a system using thermally broken wall trusses with wood fibreboard exterior insulation and 20" deep cavities for filling with Roxul. Here is how this system meets the design criteria from above:

  • Structure to the interior

The wall trusses are composed of a 2x6 stud and a 2x4 stud held together by a series of 5/8" plywood gusset plates. The 2x6 stud is the interior layer of the stud, and behaves very much like a standard 2x6 wall. The gussets support the 2x4 layer through shear resistance, and are engineered to support the siding and wood fibreboard insulation. These trusses align with the foundation below: the 2x6s bears down on the concrete, and the 2x4s are cantilevered out over the EPS foam. By building with these wall trusses, we end up with a double stud wall with an interior structural element, and the whole assembly goes together in one shot.

  • Air barrier to the interior, and as straight and uninterrupted as possible

After the walls are stood up and insulated, the interior gets clad with OSB sheathing. At the top of the walls, the floors are installed on hangers that mount to the face of the OSB and through to the floor header installed into precut notches in the 2x6 layer. The hangers will use a self-sealing nail tape during install. The result is that the OSB air barrier runs in a perfectly straight line from the foundation up to the roof (with window and door openings being the only exceptions). Easy to tape, easy to seal.

  • Excellent drying potential

The entire assembly to this point is extremely vapour open. The OSB is the most vapour resistant element so far, and it is on the warm side of all of the insulation. The mineral wool and wood fibreboard both allow water vapour to move through and dry to the exterior. This was one of the main reasons we chose to use the wood fibreboard exterior cladding over a foam material.

  • High R-value

With a 20" deep cavity and 2-5/8" of wood fibreboard on the exterior, the nominal R-value of the wall is roughly R-96!

  • Can be insulated from the interior after framing is complete using mineral wool batts

As the walls are framed, they are squared and stabilized with let-in t-braces on the exterior 2x4 layer. Coupled with temporary bracing, we are able to frame all of the exterior walls, floors, and roof prior to installing the OSB sheathing. This leaves the wall cavities open to the interior for easy installation of batt insulation. Adding the OSB after insulation is complete adds the final permanent racking strength to the house where it belongs, right against the structural framing.

We had all of the wall trusses manufactured off-site, and delivered pre-cut and labeled as a complete framing package. We have framed and lifted three wall segments so far, and although progress is slower that hoped for as we figure out the nuances, things seem to be working well! We rented a set of wall jacks to help lift the walls into place, as they are far too heavy to lift safely by hand. Here's today's timelapse showing the process.

We are starting to pick up some steam as we go. Three more sections to go on the main floor and we will be almost ready to install the second floor deck. It is really exciting to watch as the rooms of our home take shape!

There are many other details and considerations that went into this and all of the other construction methods being used in the house, so I welcome any questions or comments!

Construction week 12: the first floor

This week, the team finished installing the ledger boards, hung our floor joists (supplied by Kott), finished the interior structural framing, and set a floor on top of the floor joists. Construction is starting to resemble a more traditional site-framed home. Over the weekend, we had a family picnic in the house and even had our first official guests over to join us (of course we all wore hard hats).

We forgot to mention on the blog that last week was International Passive House Days. There were several events and tours happening around the city. There is rising interest. Mark also gave a couple tours of our place (outside of the PH week events). One to a group from NRCan (Natural Resources Canada) and one to a group of fine folks taking a Passive House course. Seeing as how our build has been garnering interest and tour requests, we will post a sign-up form (eventually) and open them up to the public. We are all-for raising awareness for Passive House...we are also pretty proud of what we’re building and happy to show it off. We'll get that going soon.

Next week, work will be geared towards the main floor walls. 

In the new toasty basement

In the new toasty basement

Welcome to the main floor

Welcome to the main floor

3-Day framing time lapse

With the amazing weather we've had for the last while we've been able to make some great progress on framing. This video shows three days' work installing the structural walls and first floor joists.

The joists are all open web joists, which will allow us to run all of our electrical, mechanical and plumbing services easily within the thickness of the floor, without requiring unsightly bulkheads or drop ceilings. Because of the significant reduction in heating demand afforded by our Passive House design, we will not need to install any traditional large metal ductwork usually seen for furnaces and A/C. The only ductwork we will need to run will be for our ventilation system, which uses 3" flexible tubing easily run through the open web joists and inside 2x4 walls.

The spans in the design were carefully limited so that we could use a 9.5" deep truss and maximize ceiling heights. The 12" spacing will create a more rigid floor to accommodate the installation of tile floor above. 

Next step is to install 3/4" plywood floor sheathing, and then very soon the first of our exterior walls!