Construction week 8: the slab


Work started this week with more rebar — the critical metal mesh which reinforces our structural concrete slab. Once the metal work was complete, our structural engineer, Peter Campbell, came by to inspect and sign-off on it. Check and check. We were ready for concrete.
I am relieved to say that the concrete pour went really well. The team was great and the slab looks great. But this step did not want to happen. First of all, concrete is surprisingly expensive. We had a hard time assembling quotes. Ended up having our guys at Cornelis Grey tie and prepare the metal, ordering our concrete from one company, and a concrete pump truck from another company. A lot of extra coordination. And then on the day before the pour, our concrete team tried to cancel on us! Fortunately for us, Mark can be very persuasive and eventually it all worked out. Once underway, they had to pause work several times to clear leaves off the wet concrete, but otherwise all good.
On Friday, our Cornelis Grey team started installing the ICF forms for our basement walls. This work will spill over to next. And today we ventured out to the Herrmann's. We ordered our Gaulhofer windows and doors through them and they have been sitting in their immaculate warehouses for a couple months now. We finally found the time to visit them. Boy are they spectacular. And those blue doors! Swoon. They will be a joy to operate every day. Really looking forward to getting those installed. We’re still hoping to be closed in before Christmas.
This was a big week. We have a fab slab. Now it’s onwards and upwards — with walls! Speaking of those walls, I think it’s high time I get Mark to post a little something about them. There aren’t enough hours in the day.
And some more pics from the week:

Concrete pour -- hand troweling near the wall rebar
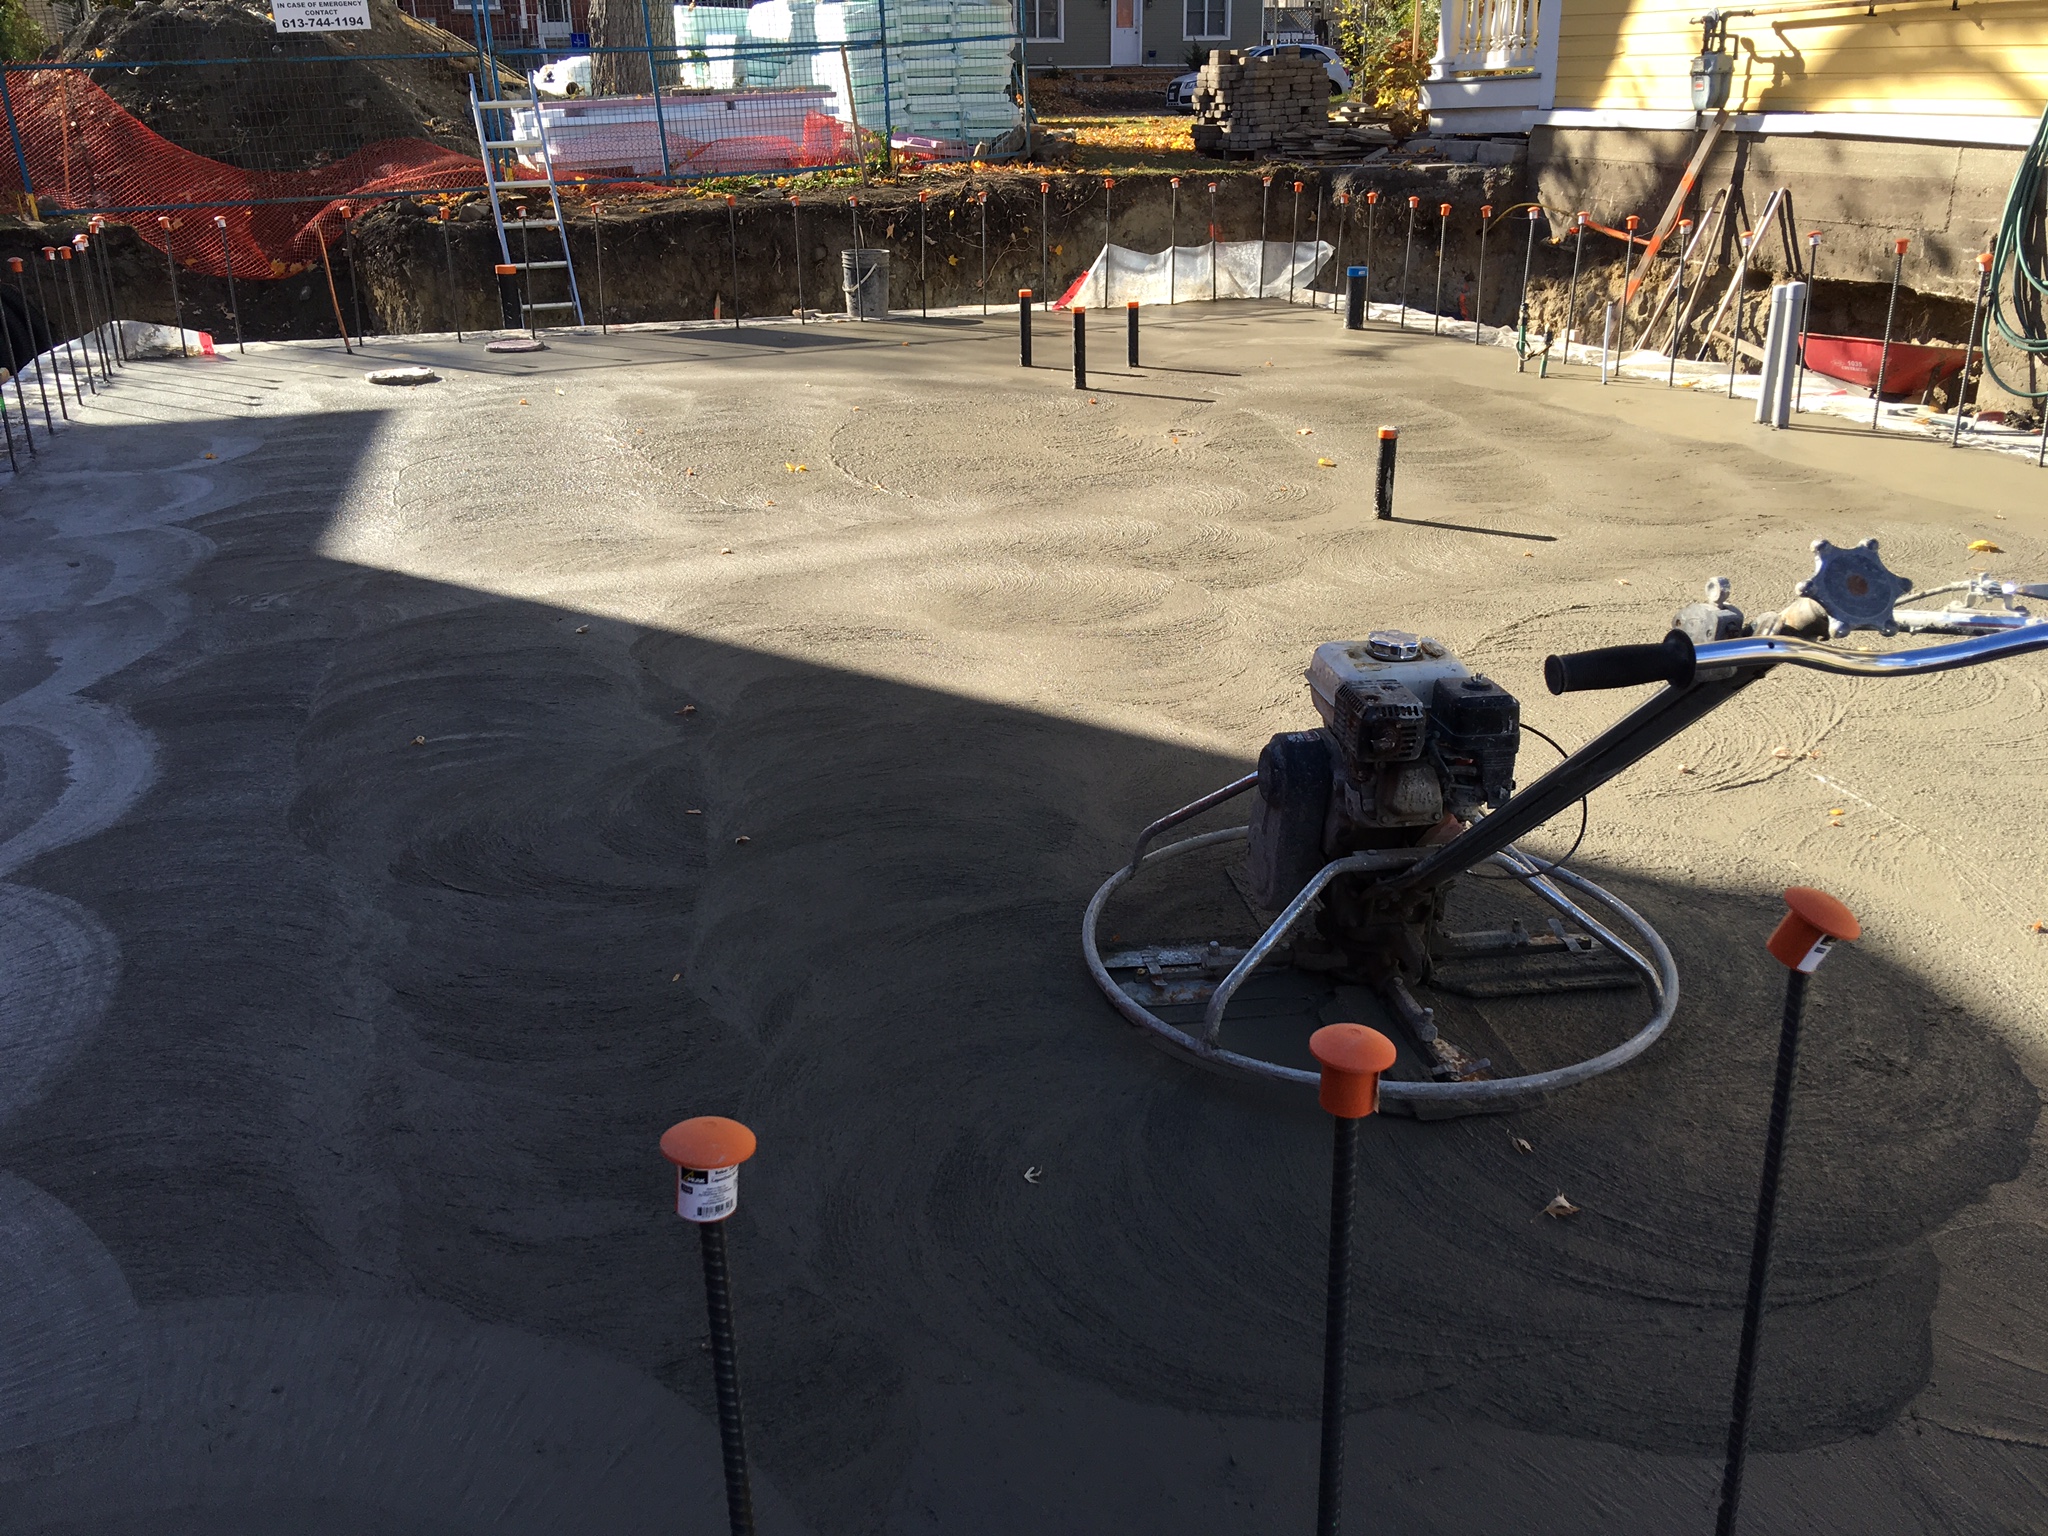
Machine leveling

Site inspection

Our big blue door!