Domestic hot water heater
Part 2 of our mechanical system, the domestic hot water heater, explained over casual couch conversations.

Documenting the design and construction from start to finish of a Passivhaus (Passive House) in Ottawa, Canada. Insider info on what it's like working with an architect and costs associated with building.
Posted in: Design
Part 2 of our mechanical system, the domestic hot water heater, explained over casual couch conversations.
Part 1 of a video series with Mark casually explaining our mechanical systems as we sit on the couch. There will be three videos following along later this week, going deeper into our mechanical systems. All of which stemmed from my earlier post on appliances.
After 30 weeks of construction, our interior wall cavities are nearly complete. They will contain our electrical and plumbing 'behind the scenes' as to not breach our Passive House air barrier. But before we can call up the electrician and plumber, The Cornelis Grey crew has a few more interior jobs to finish up first. We also need to make some key lighting and plumbing decisions. Decisions decisions.
On that note, we crept a little closer towards making some other big decisions. The biggest of which is our siding materials and install. We’re going with black hardie panel on the inside core, and natural cedar on the enveloping sleeve.
Our cladding choices
We want this inside core to feel as if it were rising from the earth, as one monolithic shape. Mark is typically not a huge fan of hardie board, especially in our case, because the standard flashing details (at the corners and between boards) can feel clunky and disjointed, which works against the unbroken, monolithic shape we were hoping for. But the price and practicality of hardie panel is hard to beat (vs. cement board). Never one to compromise, Mark has designed some custom flashing for between the boards and corners. He’s also craftily designed our electrical panel (where the meter sits on the outside of the house) and eavestrough system as well. We’re getting it bent and cut out of matching black metal. Metal is pretty cheap, even when it’s custom. It’s details like this that we hope will shine through in our house.
The cedar sleeve is the protective wrapper hugging the house. It echoes our living space and forces inward focus, which stems from our love of courtyard architecture. The black hardie-paneled core grounds the house, while the cedar screen lifts it.
We drove out to Smiths Falls this weekend to take a look at some cedar. There are so many benefits to cedar siding. We plan on allowing ours to age naturally, which will turn it from a warm blond wood to an soft silver colour. It’s super no maintenance, is water and insect resistant, and lasts a lifetime in its natural state. It’s also grown locally and milled to our specs. What’s not to love?
Eastern white cedar, aging gracefully like Meryl Streep
Before: logs of easter white cedar
After: milled 4" eastern white cedar with 'v' groove
I've explained a bit of the 'why' behind our siding choices. But there were certainly many other factors that played unto our decision-making. You may have noticed we have two brightly coloured neighbours? If you haven’t, one is canary yellow while the other is straight-up orange. On the one hand, we could have followed suit and painted it a wacky bright colour, becoming Ottawa’s very own ‘painted ladies’. But on the other...we’ve decided to contrast them by keeping things natural and neutral, while complementing them with a solid ultramarine blue door. We’ll be introducing more colour with our front yard planter boxes and decking, which will incorporate some rusty-coloured weathering steel. The house will probably recede as it ages gracefully and settles into it’s new home on the street.
And last but not least:
Drumroll please….
The preliminary air test was completed.
Stay tuned for the results, hehe.
Hint: we passed with flying colours.
This past weekend, the Chelsea Passive House clients of Mark’s, invited everyone who worked on their home over for a wine and cheese mixer. It was really special and in many ways, the carrot at the end of the stick for me. I asked Mrs. Chelsea Passive House, ‘was it all worth it?’, because if you read my last blog post you will know that I’m a stress-case at the moment. Her response was on-point. She said, “it’s like asking a pregnant women while in labour if it’s worth it”. Couldn’t have said it better myself :) Right now I'm in the thick of a really long one...
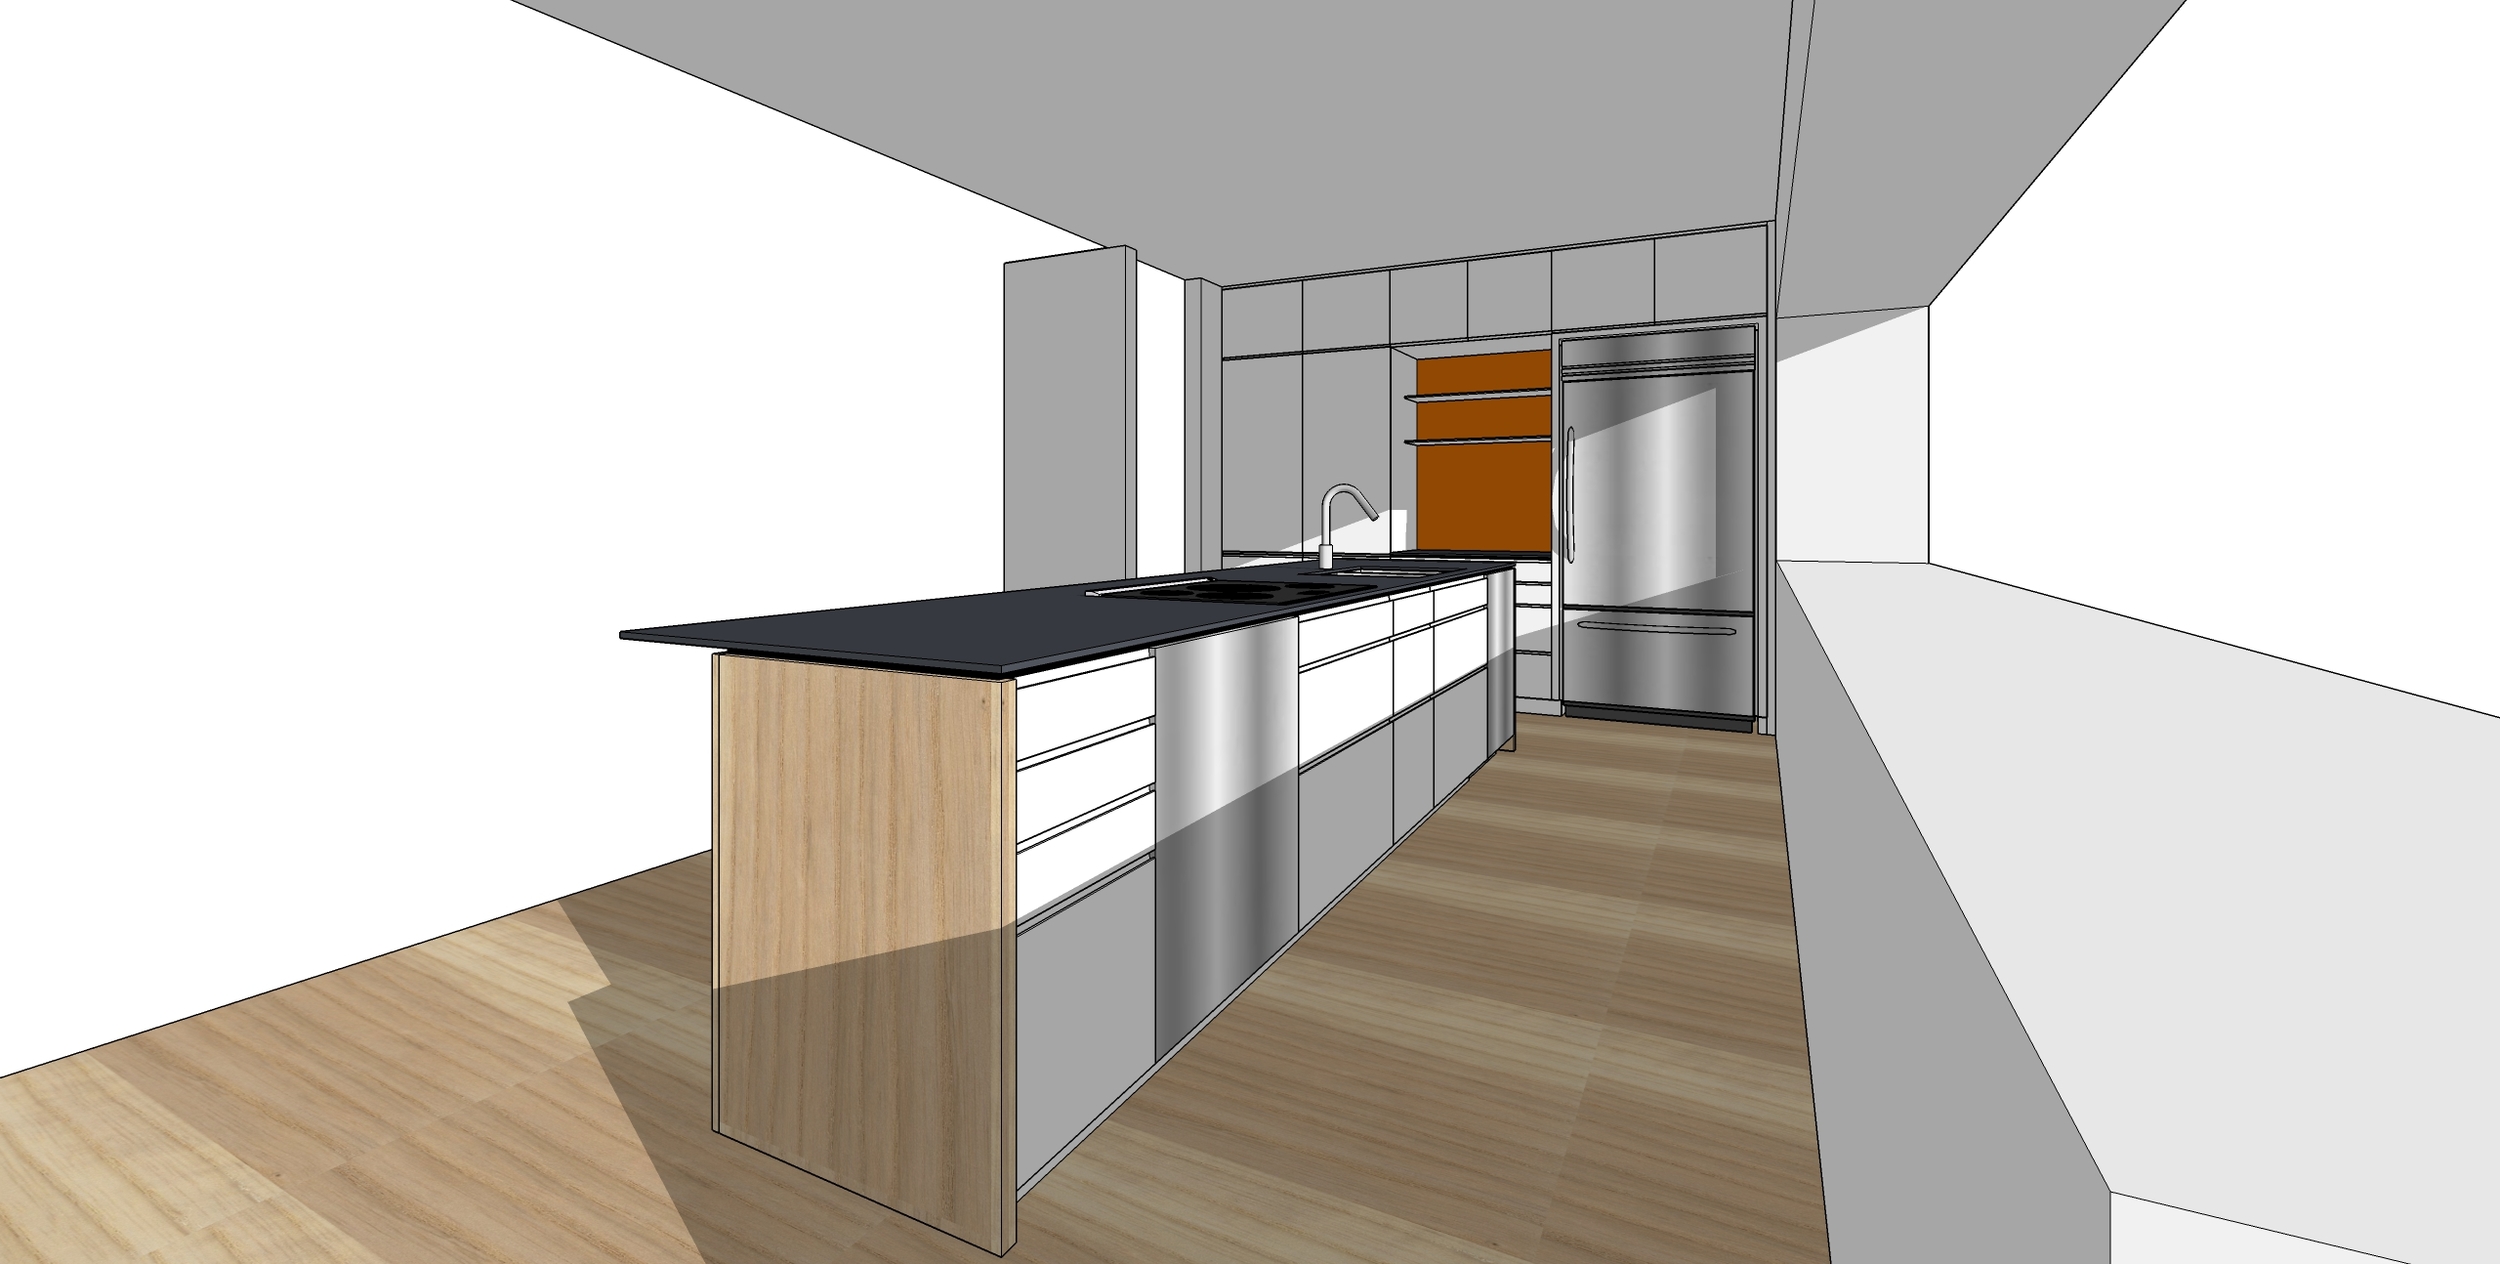
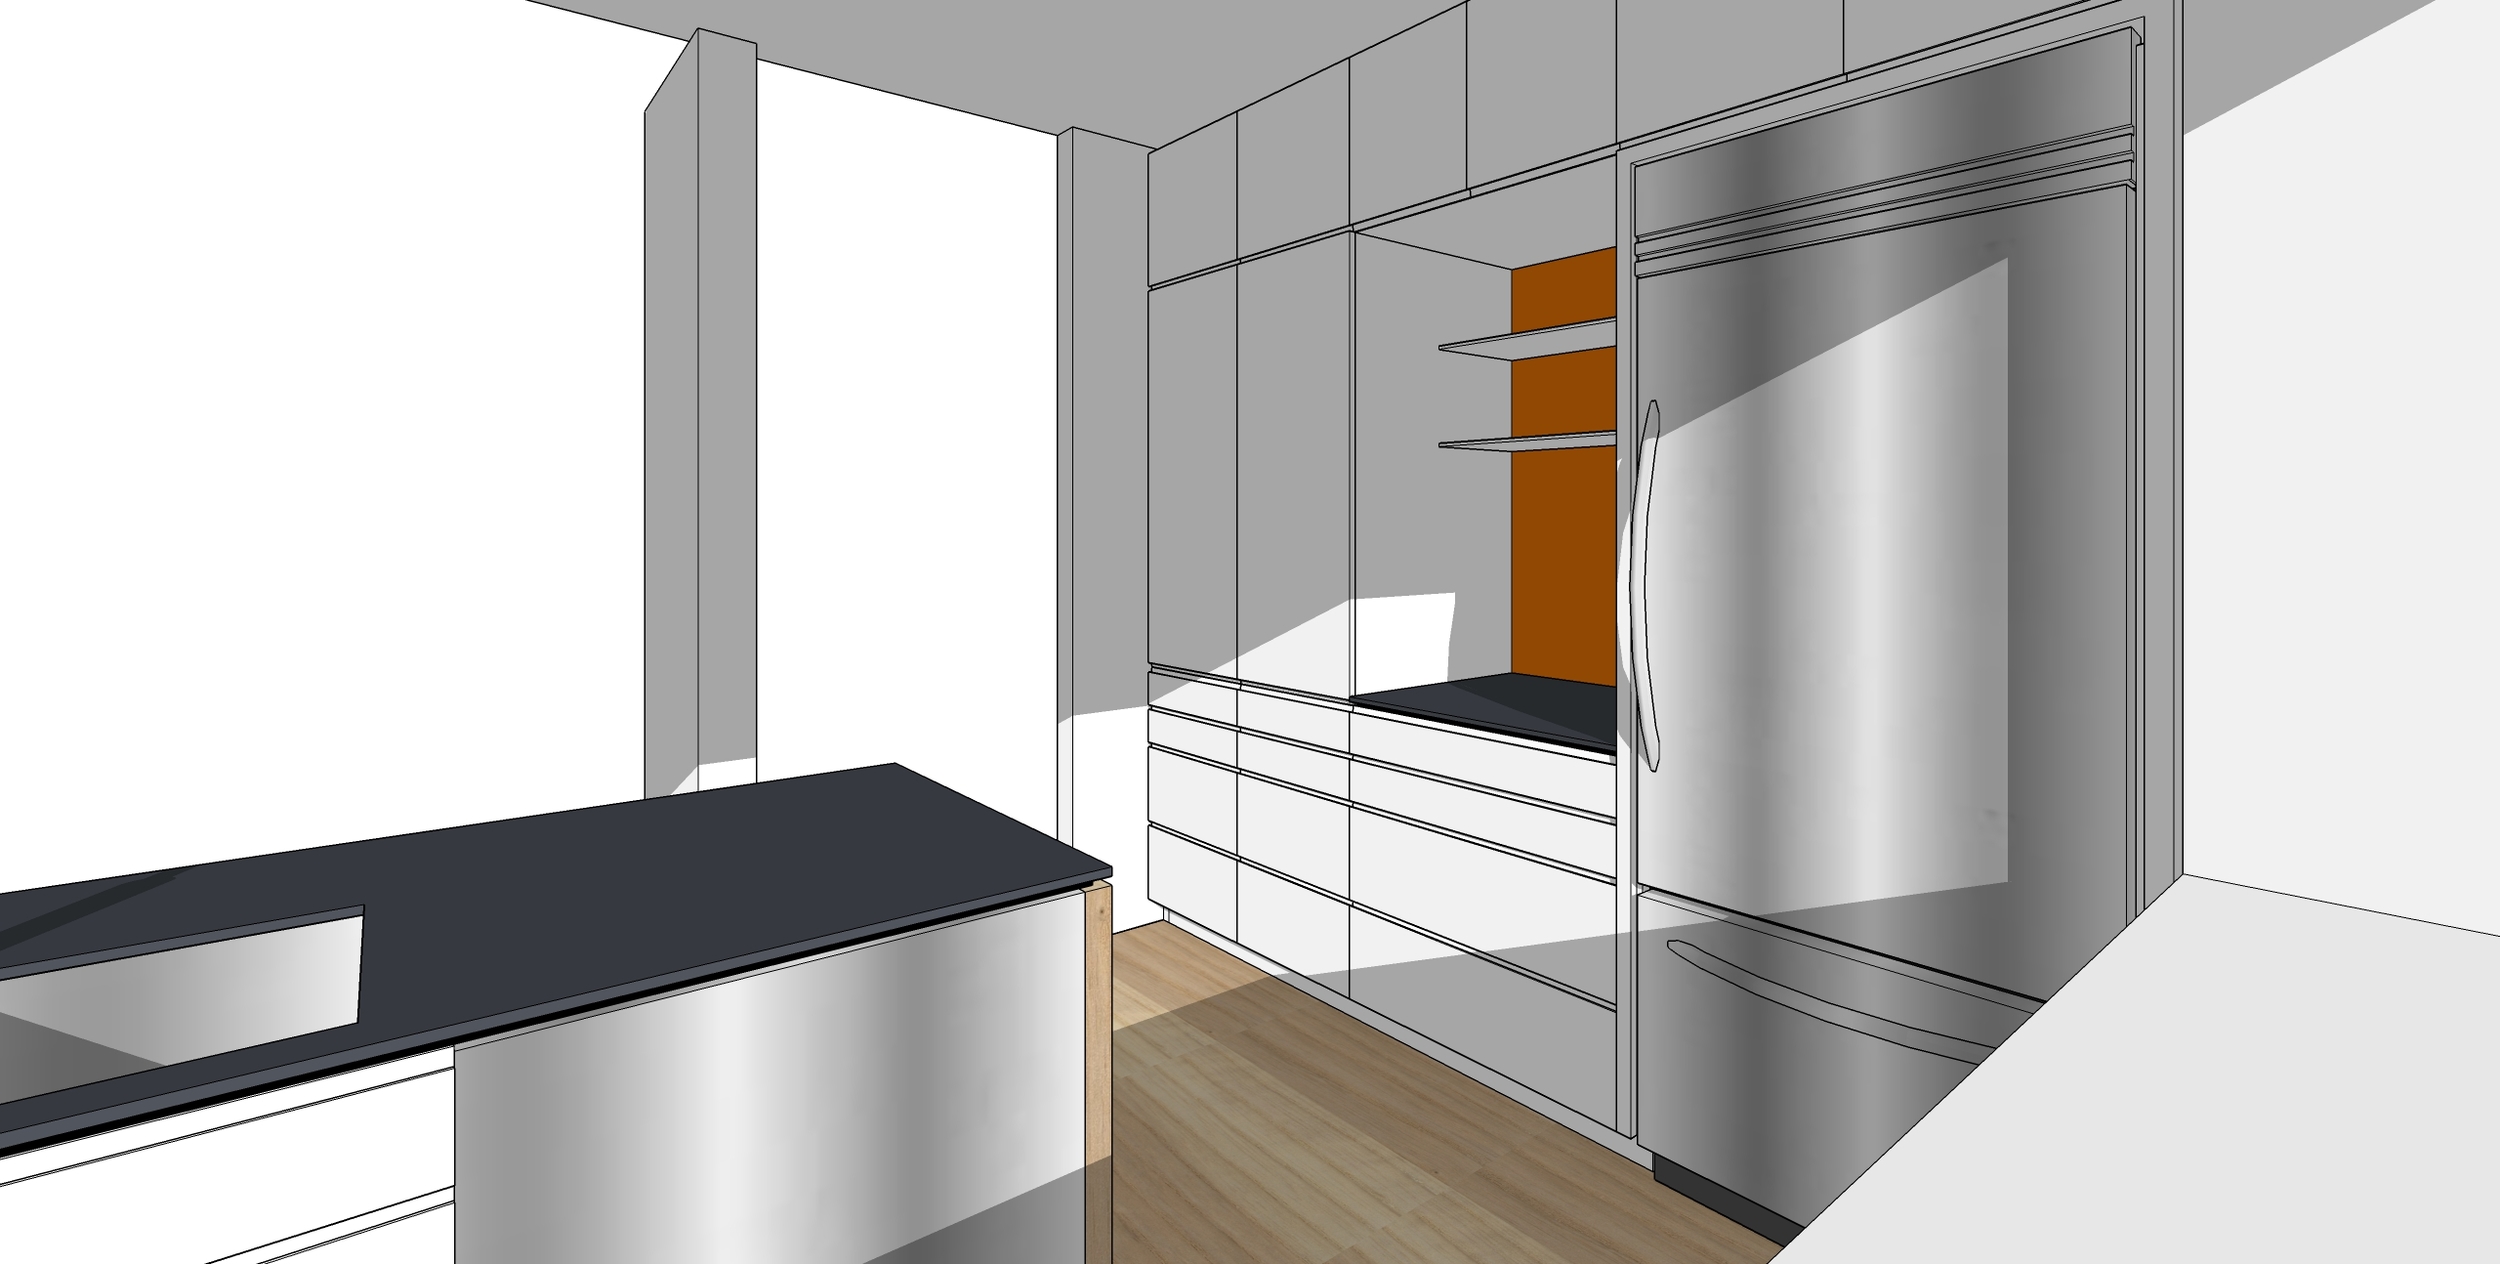
We’ve been finalizing our kitchen design. Check it out! Mark had originally designed the kitchen to fit Ikea components, in case we decided to go that route (for economic reasons). But after meeting with a couple kitchen designers and weighing the pros and cons, I think we’re going to go custom. And we were casually browsing appliance stores this weekend when we stumbled upon a built-in refrigerator at an ultra discount floor model price. It’s the same price as the other non-built-in option we were contemplating and has all the nice design features and benefits that we were looking for. So, yay!
We approached several kitchen designers with our initial design. They were able to bring some outside perspective to our layout. Kitchen design is something that architects do as well, but kitchen designers really know their products and details like under sink garbage options and drawer vs. door that really help. I wouldn't say they 'designed' out kitchen, Mark did, but they helped work through the details with us.
Deciding on our appliances also weighed in on our decision making. I’ll write a separate post about the appliances, because it requires one (Passive House limits our options in this area). We went back and forth on a few items. Wall ovens vs. island oven and pantry space. Pantry space was important to me. Even though I like the idea of a wall oven, pantry has a higher priority for me in terms of chest-height accessibility. We have ideas for finishes, but that will all be worked out once we design which company we’re going to go with. Both are great options, it will likely come down to cost and who we like working with.
As an aside, we aren’t basing all of our decisions on cost alone. It definitely weighs heavily, but we also want to work with people with whom we actually like. Mark wants to build long term relationships and find people he would feel comfortable referring his future clients to as well.
And on to week 28...
Our crew started on interior wall framing and have been going around the outside of the house on scaffolding sealing and taping the wood fibreboard spots they missed when they had to stand up the walls. Mark also did some more interior air barrier sealing with that Siga tape.
We’ve also been busy pulling quotes together and meeting various sub-contractors on site for things like siding and ceiling insulation. Starting to make some headway…
Our roof is getting insulation this week. Walls continue to go up. Hopefully Mark will be able to perform our first blower-door test and we’ll begin the service cavity walls as well.
One of our wall sections being assembled and ready for lifting!
With the wood framed walls well underway now, I thought it was high time that I sat down to write a post about the design and theory behind the wall system we are using. When we set out to build our project, I spent a lot of time thinking about double stud wall construction. For those unfamiliar, a double stud wall is a wall made up of two seperately framed walls, one inside of the other, usually seperated by a space for insulation. The beauty of the double stud wall is that the overall thickness of the wall is very flexible: by moving the two stud walls further apart you can add insulation and increase the effective R-value of the whole assembly. The continuous insulation is also a great thermal break preventing thermal bridging through studs.
Still, there are a couple of challenges that the traditional double stud wall presents. First of all, the exterior wall is usually built first, and the interior wall much later once the house is enclosed. The main drawback of this is that the exterior wall necessarily becomes the load bearing structural wall. I'm a big fan of keeping structure as much to the inside of the thermal envelope as possible for two reasons: first, it keeps the structural elements warm and dry and protected from cycles of expansion and contraction, and second, it reduces the number of structural penetrations or complex structural details that interfere with a good air barrier.
When designing the system for our project, I set some key goals for myself. I wanted to have a system that hit all of these key points:
As discussed above, this is just the right place for structure to be. It also facilitates the next point below...
I wanted to use OSB with taped joints for the primary air barrier. In order to keep from having a messy transition at floors, the idea was to come up with a way to run the air barrier up straight past the floors without joist cavities to contend with
With all walls, and especially with high R-value walls, it is crucial that the wall has good drying potential, and that no opportunities for condensation are created within the assembly.
This could have been the first point. Super-insulated is Passive House's alternate code name.
I wanted to avoid insulation that would require scaffolding or lifts for installation, partly because of the limitations of the site, and partly for cost and labour savings. In terms of insulation type, I'm a big fan of mineral wool insulation. What's not to love? It's water resistant, mould-proof, fire-proof, high in recycled content, and has a good R-value that actually improves as it gets colder outside.
Wall section: Click to enlarge
Many hours of sketching and head scratching and I came up with the idea of creating a hybrid system. Taking some cues from Swedish platform framing, and some from the double stud wall approach, I designed a system using thermally broken wall trusses with wood fibreboard exterior insulation and 20" deep cavities for filling with Roxul. Here is how this system meets the design criteria from above:
The wall trusses are composed of a 2x6 stud and a 2x4 stud held together by a series of 5/8" plywood gusset plates. The 2x6 stud is the interior layer of the stud, and behaves very much like a standard 2x6 wall. The gussets support the 2x4 layer through shear resistance, and are engineered to support the siding and wood fibreboard insulation. These trusses align with the foundation below: the 2x6s bears down on the concrete, and the 2x4s are cantilevered out over the EPS foam. By building with these wall trusses, we end up with a double stud wall with an interior structural element, and the whole assembly goes together in one shot.
After the walls are stood up and insulated, the interior gets clad with OSB sheathing. At the top of the walls, the floors are installed on hangers that mount to the face of the OSB and through to the floor header installed into precut notches in the 2x6 layer. The hangers will use a self-sealing nail tape during install. The result is that the OSB air barrier runs in a perfectly straight line from the foundation up to the roof (with window and door openings being the only exceptions). Easy to tape, easy to seal.
The entire assembly to this point is extremely vapour open. The OSB is the most vapour resistant element so far, and it is on the warm side of all of the insulation. The mineral wool and wood fibreboard both allow water vapour to move through and dry to the exterior. This was one of the main reasons we chose to use the wood fibreboard exterior cladding over a foam material.
With a 20" deep cavity and 2-5/8" of wood fibreboard on the exterior, the nominal R-value of the wall is roughly R-96!
As the walls are framed, they are squared and stabilized with let-in t-braces on the exterior 2x4 layer. Coupled with temporary bracing, we are able to frame all of the exterior walls, floors, and roof prior to installing the OSB sheathing. This leaves the wall cavities open to the interior for easy installation of batt insulation. Adding the OSB after insulation is complete adds the final permanent racking strength to the house where it belongs, right against the structural framing.
We had all of the wall trusses manufactured off-site, and delivered pre-cut and labeled as a complete framing package. We have framed and lifted three wall segments so far, and although progress is slower that hoped for as we figure out the nuances, things seem to be working well! We rented a set of wall jacks to help lift the walls into place, as they are far too heavy to lift safely by hand. Here's today's timelapse showing the process.
We are starting to pick up some steam as we go. Three more sections to go on the main floor and we will be almost ready to install the second floor deck. It is really exciting to watch as the rooms of our home take shape!
There are many other details and considerations that went into this and all of the other construction methods being used in the house, so I welcome any questions or comments!
Mark whipped up a new rendering of the house for the site sign I'm putting together. Can't wait to duplicate this image in real life.
Slab and foundation/basement walls with insulation and frost skirt
With the slab poured and the ICF well under way, I thought I would write a quick post with visuals explaining the construction methods and materials being used. I've created some images to go along with all the photos we've been posting to hopefully add some clarity to what you've been looking at so far!
The images above and below show the concrete foundation and foam insulation as it will be once completed. The image below has labels calling out the various layers.
Components of the foundation
The biggest difference between our foundation and a typical residential foundation is the lack of concrete footings. A typical foundation would pour strip concrete footings right onto undisturbed soil, then pour the concrete walls, and finally pour the slab inside the walls. In our home, the slab is poured before the walls and will actually support them, which is why it is so much thicker (8" instead of the standard 4") and has so much steel rebar in it. It is also completely contained within the foam insulation tray, eliminating any thermal bridging through the concrete to the ground. The end result of this is a concrete floor that will retain the heat it absorbs from the house above, rather than simply dumping it through into the ground.
The walls on top of the slab are made up of three layers. First is the ICF (insulated concrete forms) from Nudura. These are like Lego for grow ups. They snap together to form the walls and are held apart by integrated webbing. The cavity is 6" wide and on Friday we will be pouring it full of concrete. Watch for photos this week showing the alignment system that will ensure the walls are straight and true as the concrete is poured.
Once the concrete is poured and the walls straightened, we will be adding two more layers of foam from Styrorail to the exterior to build up the insulation value of the walls. The first layer has horizontal wood strapping embedded, and the second layer will cover this wood and effectively embed it in the middle of the wall. The foam will be glued in place using PL 300 glue, which is specifically formulated not to deteriorate the foam over time. The horizontal wood strapping gives us something to tie back into when we go to install our siding above grade.
The slab poured and the first layer of ICF in place.
Now let's talk about the big white elephant in the room: why so much foam? The amount of insulation is one of the trade offs required to achieve passive house performance on such a challenging site. Because of the limitations of orientation and south-facing window areas, we have to compensate by beefing up the thermal envelope more aggressively than you might find in other passive house projects. The final thickness was determined after several rounds of refinement of the energy model (using PHPP for those keeping track). The really nice thing about this configuration is that all of the concrete is on the warm side of the thermal envelope, where it will hold its warmth, and is protected from expansion and contraction. This alignment becomes especially important when we get to the design of the framed walls above...more on that soon.
ICF at the end of 1 day's work.